Posts Tagged ‘Halloween’

Decorating for Halloween

Decorating for Halloween

Halloween is one of our family’s favorite holidays…probably because of the decorating and crafts.  Now that the weather is cooling off and October has arrived it is time to start planning your Halloween décor.  I like to decorate for fall the first 3 weeks of October, but then pull out the Halloween items toward the end of the month.  Once November comes, put the fall decorations back out.  Go to the mall or your local superstore to get ideas and find good deals.  Use a journal to write out your ideas and make a plan for indoors and outside.

Here are some easy ideas:

INDOORS

-Use small pumpkins found at the grocery store to fill vases or urns.

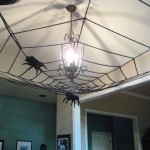
-Stings of fishing line taped above a door jam will give your guests shivers down their spin thinking they just walked through a spider web.

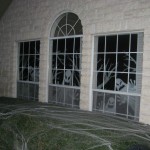
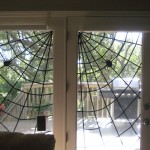
-Use black electrical tape to create spider webs on your windows.  Use double stick tape to add plastic spiders.

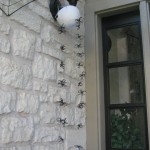
-Make styrofoam spiders and place up the walls with double stick tape.

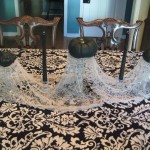
-Find white lace window curtains at a discount store to use as a table cloth or runner.

-If you like to decorate with a theme, choose one or two colors and spray paint pumpkins or artificial flowers to coordinate.

-Visit your local craft store and search for inexpensive decorations that can be painted or embellished (paper mache shapes and figures are great).

OUTDOORS

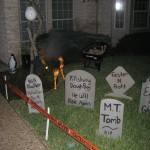
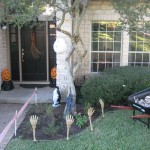
-Cutout tombstones from cardboard, spray paint grey, and write funny sayings on the front.  For ideas visit http://www.all-about-halloween.com/epitaphs.html.

-Check your local papers for fall festivals or fund raisers to buy your pumpkins.  You can also find a local farm and take your whole family to choose their pumpkins.

-Carve your pumpkins, but not too early or they will rot.  There are hundreds of ideas and templates online so do a little searching to find the one you like best.

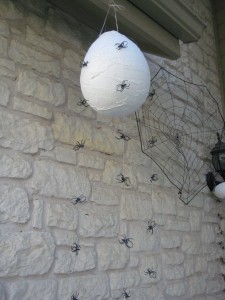
-Make Spider Nests

-Strobe lights and fog machines add lots of drama to your front yard.

-Lots and lots of spider web.  For best results have a partner help you stretch out the web so it looks more realistic.  Place on bushes and wrap around trees.

Halloween is a great time to throw a party.  Visit my post about throwing a Gothic Gala.

Here are a few of my favorite links to visit for new ideas for Halloween:

http://familyfun.go.com/halloween/

http://www.marthastewart.com/holidays

http://www.potterybarnkids.com/shop/kids/halloween/halloween-decor

http://www.orientaltrading.com/halloween/toys-games-a1-388560+1237-7-0.fltr
http://www.kraftrecipes.com/recipes/holidays-and-entertaining/holidays/halloween/halloween-party-center.aspx

Styrofoam Spiders

Styrofoam Spiders

MATERIALS:

Foam eggs

Black pipe cleaners

Red pom poms

Black paint

Red paint

Exacto knife

Hot glue

DIRECTIONS:

IMG_2834

First, cut the plastic-foam egg in half lengthwise. Form the body of the spider by creating a T shaped groove that is a ¼ inch deep using an exacto knife.   Paint the body of the spider black and let dry.  Then fill in the groove with red paint.

For legs, cut six pieces of pipe cleaners for each beetle. Push one end of each leg into the underside of each beetle’s body and bend outward. Drop a bit of glue on each leg where it joins the body. After the glue has dried, bend the legs.  Cut two short pipe cleaners for antennae. Insert antennae into the front of each head and bend as desired.  Glue two red pom poms above the antennae for eyes.

IMG_2909I grouped a few spiders together and stuck them on the walls and window.  Use various sizes of foam eggs to get different size spiders.

Gothic Gala Halloween Party

Gothic Gala

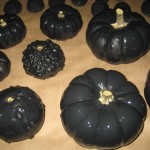
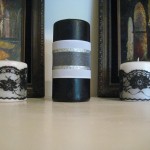
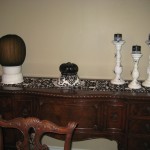
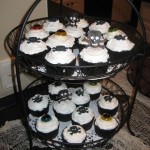
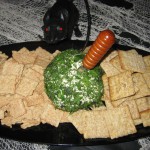
Halloween is a great opportunity to throw a theme party for your friends and family.  One idea is a Gothic Gala.  The theme is simple yet can be dramatic.  I kept the decorations to black and white to keep it simple and cheap.  I painted pumpkins black, used black pillar candles embellished with lace and glitter, and pulled out my old lace tablecloths and sheets to add to the ambiance.  If you have guests that are timid to dress up suggest they wear black or leather.  Have fun with your food and try to make it go with the theme like dark chocolate cupcakes or a mossy cheese ball.

I love to use a website like evite.com to send out causal invitations for parties.  Here is a suggestion on the wording:

Our home has gone to the dark side causing a fright,

You don’t want to miss this (Family Name) game night.

It’s a gothic theme so bring your leather and spikes,

Or just wear a black t-shirt if that’s what you like.

Response Options:

Trick or Treat? (waiting to respond)

Dead or alive, I’m there. (yes)

Maybe, if I find my spiked collar (maybe)

Boooooo! (no)

Spider Nest

Spider Nest

MATERIALS:

Plaster fabric strips (Rigid Wrap)

Large balloons (at least 11 inches)

Fishing line

Plastic spiders

Hot glue

Pin/needle

2 bowls

DIRECTIONS:

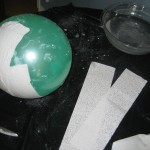
IMG_2848Inflate balloon and set it in a bowl to avoid it rolling away from you.  Fill a bowl of water to be used with the plaster strips.  Read and follow the directions that come with the plaster strips.  It is easier to use if the material is cut into pieces 8-10 inches long.  With the knotted end of the balloon pointed up toward the ceiling start covering the balloon from the top working your way down and around layering each piece over each other.  Don’t worry about smoothing out all the bumps as this will add texture to the finished project.  Continue layering the plaster cloth around the balloon.  Let dry according to the directions.

Once the plaster has dried, use a pin or needle to pop the balloon.  Cut several pieces of fishing lines in various lengths.  Tie the spiders onto the fishing line every 6 inches.  Use a pin to make a hole at the top of the plaster mold and tie the fishing line securely allowing the spiders to hang down.  To finish the project add a few spiders to the outside of the plaster form using hot glue so it looks like they are hatching and leaving the spider nest.  Use fishing line or thin twine to hang the completed spiders nest.

IMG_2903This project was found at http://familyfun.go.com/halloween.  For a more kid friendly version of this craft visit, http://www.ehow.com/how_4500321_make-spider-nest-halloween-decoration.html.  Styrofoam balls and cotton are a simple and clean version of this creepy craft.

Pumpkin Dip

Pumpkin Dippumpkins

INGREDIENTS:

1 (8 ounce) package cream cheese, softened

2 cups confectioners’ sugar

1 (15 ounce) can solid pack pumpkin

1 tablespoon ground cinnamon

1 tablespoon pumpkin pie spice

1 teaspoon frozen orange juice concentrate

1 small pumpkin

DIRECTIONS:

In a medium bowl, blend cream cheese and confectioners’ sugar until smooth.  Gradually mix in the pumpkin. Stir in the cinnamon, pumpkin pie spice, and orange juice until smooth and well blended. Chill until serving.  To serve, hallow out a small pumpkin and fill with pumpkin dip.  Place on a platter surrounded with graham cracker sticks, ginger snaps, or even apples.  This makes a festive decoration and yummy treat for guests to enjoy.