Archive for February, 2010

Blast to the Past Birthday Party

candlesbirthday giftI remember growing up as a kid and planning my birthday parties.  I never got everything I wanted, but my imagination was much too big for anyone parent’s wallet.  Now that I am all grown it is time to celebrate big.  Blast to the past birthday is a way to be a kid again and celebrate like you did back when you were 7, but with better drinks and food…and all the dessert you want to eat.

Communication:

I suggest using www.evite.com for your invitations.

Sample wording:

We are going back to our childish ways to celebrate (Name) Birthday.  Festivities include (Name’s) favorite birthday meal (enter food), cake & ice cream, piñata, water balloon toss, pin the tail on the donkey, and more.

*For an adult birthday, it is important to indicate if gifts are welcome.  If not suggest donating to a charity in honor of the birthday boy/girl.

*Include a note if children are welcome.  Just because it is a kid themed party, does not mean that it is appropriate for kids to attend.

Decorations:balloons

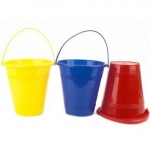
The trick for setting the mood for this party is lots of color.  Use primary colors for: streamers, balloons, plates/plastic-ware/cups, and tablecloths.  The most cost-effective way to get lots of color is using streamers.  You can use multiple colors at one time and string from one corner of the room to another (crossing each other beach bucketsin the center of the room).  Add a few balloons on the mailbox, stair way, serving tables, and especially on the chair of the birthday girl/boy.  To encourage guests to have fun get small toys and place around the tables (yo-yos, bouncy balls, playdough).  Beach buckets make great containers to display candy from your childhood or for serving chips.  For a big wow, set up a brownie bar that shows a variety of toppings and sugary sweets that guests will enjoy with the time is right.  Plan out the spaces where the games will take place.  Use card tables to set up game stations so guests can prepare themselves for the fun to come.
Entertainment:Party hat_1

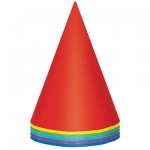
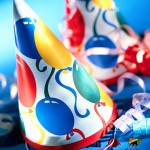
Party Hat Center – At the entrance to your party post a sign stating “Must have party hat to enter”.  Get plain party hats and provide stickers and markers so guests can decorate their own hat.  Suggest that guests write their name on their hat so everyone can meet and greet each other.

Pin the Tail on the Donkey – Most party stores will have a set that can be purchase that includes all the pieces to play this game.  Have everyone write their name on the game piece and then blindfold each person when it is their turn.  This is a great photo opportunity so have the camera ready.  Also make sure to have prizes on hand (movie tickets, large candy bars, Starbucks gift card).

Water Balloon Toss – This childhood game is great, but only if it is warm outside.  Fill the balloons with water a few hours before the party in a large tub.  Put the tub out of sight or you may have fun before you are ready.  Everyone pairs up and starts 3 feet away from their partner other.  With each successful pass on teammate takes a step back.  I like to use various sized balloons so the game gets harder as participants are eliminated.  Have towels on hand in case a balloon fight breaks out.Pinata
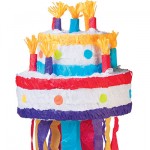
Piñata – Plain and simple is all you need here.  Spend a little more and get the good candy.  It is embarrassing to have candy left on the ground because no one wants to take it.  With adults, it is a must to blindfold and spin each person that will take a swing.  Have goodie bags on hand so all that candy goes home with your guests.

You can expand this kid’s party idea to include:

-Princess Party

-Slumber Party

-Superhero Party

-Pirate Party

-Star Wars

-Inflatable Party (there are lots of options for adults)

Recycled T-shirt

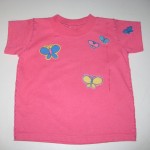
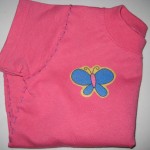
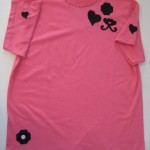
IMG_4390 IMG_4391 IMG_4396 IMG_4397

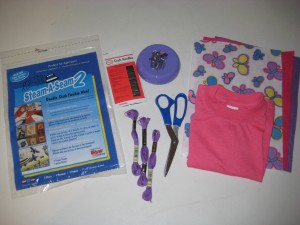
Materials:

T-shirtIMG_4371

Felt ( I used felt with a butterfly pattern)

Double stick fusible web

Scissors

Pins

Embroidery thread

Embroidery needle

Iron

Ironing board

Make sure the t-shirt is washed and dried so it doesn’t shrink after you embellish it.

IMG_4373

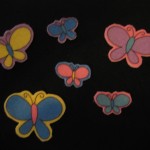
Start by preparing the shapes you want to add to the t-shirt.  Peel the paper liner off one side of the web, and stick to the back of your felt.  Trace your desired shape(s) on the back of the web.  With a sharp pair of scissors, slowly cut along the shape for a clean edge.IMG_4374

Next, cut the inside seam along the sides and arm hole.  If there is no side seam just cut straight up each side.  I find it easiest if you turn the shirt inside out and follow the surged line.  After each seam is cut you should have a total of 3 pieces (2 sleeves and 1 long torso with the neck whole in the middle). If you are worried that the t-shirt may pull at the side seams you can simple leave the sides together and stitch up the side.

Get your iron plugged in and heated up.  Layout the shapes on your shirt to determine the right placement.  Remove the web paper backing from your shape and place on the shirt.  I suggest turning the shirt inside to iron to avoid the felt getting discolored.  The fusing web directions tell you to use steam, but that ruined my felt.  I removed the water from the iron and the web worked great.  Hold the iron still on the shape for 10-15 seconds. Be careful to not move the iron around.

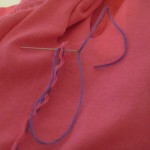
IMG_4387Now that the shapes are secure on your shirt it is time to reassemble the piece back together.  Line up the edges of the shirt and use pins to keep together.  Don’t get frustrated if the edges are rolling, it will add to the look of the shirt.  Get your needle and thread.  To determine how much thread you will need, simply double the length of the seam you are sewing.  Thread the needle and tie off the end leaving a little extra at the top of the needle.  Anytime you are starting and finishing a seam it is important to secure the ends by making a double stitch at the end (forming a loop).  Start sewing up one side of the shirt using a ¼ inch stitch (in and out motion, nothing fancy here).  Do each of the side first and then move on to the sleeves, first pining and then stitching.

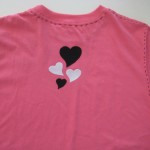
For extra detail you can stitch around the neckline and shoulders.  I loved adding a smaller shape to the arms and back of the shirt.  Be creative with color combinations and varying your shapes.  The t-shirt should be your canvas.  Sometimes simple is better…but do what you like.

Finished shirt should be washed inside out and laid flat to dry.  Avoid the dryer.

This idea was featured on She’s Crafty (ION Life Network) with guest star Teresa Findlay of “Dirty Laundry”.

Disneyland Birthday Celebration

3150450425_395d2eab08

Here is a great way to celebrate a birthday: go to the happiest place on earth (Disneyland). There are so many ways to take your party to the princess’ palace and have a blast at any age.

Invitation:

I suggest using Evite as you can include so many more details that on paper.

Body of the invite:

We can hardly believe it’s true.

Our little girl is turning two!

Grab your mouse ears and save the date

We’re going to Disneyland to celebrate

Other messages:

“Oh, Toodles…Look who is turning (age). Join us for a fun celebration at Mickey’s Clubhouse.”

Join us for a Goofy good time with Mickey and all his clubhouse friends as we celebrate (Name’s) birthday!

Have fun with the main message. Brainstorm words that go with the person’s name and age along with characters from Disneyland.

You can also customize the guest responses in your Evite to the ones below:

Who’s coming?—>See ya soon!

Attending——->Oh boy!

Undecided——>Gosh!

Declined——–>Aw, gee.

If you want to mail or hand out invitations here are a few resources:

Downloadable templates

Customizable Invitations

Entertainment:

For younger kids it is important to plan in rest time and meals into your day. You might consider getting a hotel room near the park so you have a warm/cool place to take a nap and get bundled up for the evening. You might want to create a schedule so all the guests would know where the birthday girl would be throughout the day. This will encouraged guests to get the most out of the park, but also balanced with celebrating with a young child.

Sample Schedule:

Fantasyland – 9am to noon

Lunch at Tomorrowland Terrace –noon to 1pm

Toon Town – 1pm to 3pm

Tomorrowland – 3pm to 4pm

The Plaza Inn Birthday Party (details below) – 2pm to 3pm

Adventureland – 3pm to 5pm

Disneyland Railroad – 5pm to 6pm

Dinner and rest off site – 6pm to 8pm

Fantasmic – 9pm to 10pm

Make sure to look at the parade and show schedule for the specific date you will be at the park. Watching a show will allow your feet to rest and get away from all the crowds.

My Disneyland Birthday Party:

For reservations, information and pricing, please call (714) 781-DINE. Hosted by Pat E. Cake, a fun-filled celebration featuring music, merriment, laughter and cake decorating — with a special appearance by Mickey and Minnie Mouse. All Guests receive a party hat, souvenir sipper cup, mini birthday cake, icing and cake toppings., The Plaza Inn Birthday Party takes place Monday thru Friday at 2pm, and lasts anywhere from 45 minutes to 1 hour. $15.99 per person.

Additional Resources for your Disneyland trip:

*Personal-Size Party Cake and Princess Jewelry Box ($15), can be ordered at any full service restaurant

*At City Hall ask for a Birthday Sticker. The birthday sticker entitles you to special treatment from the Disneyland Cast Members, who will always happily tell you Happy Birthday.

*Rider Swap: Take advantage of the Rider Swap policy, which lets adult Guests take turns waiting with youngsters too small or may not want to ride a certain attraction and then “swap” with another adult Guest from their party so both can experience the ride without standing in line twice.

*IPhone users can download apps to get attraction wait times, a park map and so much more. Visit ITunes and search Disneyland.

Mouse ears:

For a fun keepsake you can get mouse ears for guests to wear at the park or take home so the fun continues. Here are 2 ideas depending on the price range.

Mickey Cubhouse Ears

Personalized Mouse Ears, just like you get at the park

Dress Up:

I always love it when I see little girls at Disneyland wearing the princess dresses. If you decide to do this make sure your little one is comfortable and warm. Here are a few available from the Disney Store.

http://www.disneystore.com/kids-apparel-accessories/costumes/girls/c/57493/.

Perfect Playdough

This recipe makes great playdough and it is easy for the kids to help make.

Ingredients:

2 teaspoons cream of tartar

1/2 cup salt

1 cup flour

Food coloring

Kool-Aid (optional for color and smell)

1 tablespoon of salad oil (veg oil fine)

1 cup water

Large plastic bag

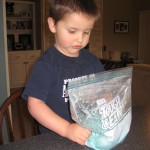
Combine all the dry ingredients and food coloring in a large plastic storage bag.  Allow children to mix up all the ingredients.  Empty the dry ingredients into a sauce pan.  Add water and oil.  Cook over medium heat stirring constantly until the mixture becomes thick and pulls away from the edges of the pan, about 2-3 minutes).  Knead on countertop until smooth.  Once cool, allow the kids to knead the dough.  Store in an air-tight container.  Use cookie cutter to make shapes.  If you have no artistic juices try making worms, snakes, or caterpillars.

Planning a Party

party-hatI don’t think of myself as a party planner or an expert, but I do enjoy a good time and have the gift of hospitality.  Going to a party in an uncomfortable or uptight environment is just wrong.  Here are a few tips to make sure that your guests aren’t disappointed at your next event.

Communication:

The way you communicate the details of your event says a lot about you and the event.  For a more casual affair, I use www.evite.com.  Everyone seems to be on email these days, so sending them the details electronically are perfectly acceptable.  For a more formal event, paper and postage are still your best bet…but be creative.  Themed postage stamps and ornamented invitations will add to the mood of your party.

No matter what form your invitation takes, be sure to tell your guests the Who, What, Where, and Whys but also consider the following as well: are children welcome, do they need to bring anything, what activities will be taking place, are gifts welcomed (if so, provide some ideas), is there a dress code, and make sure to indicate your theme through the verbiage and invitation.

Timing is an important game in sending out an invitation.  Send it too early and people will forget, too late and they will already have plans.  For formal events, like a wedding or anniversary party, get your invitations out no later than 6 week.  For a birthday party, I would say 4 weeks.  For an informal get together, like our Game Nights, you can get away with 2 weeks.

Decorations:

You can add decorations to any event, big or small, on any budget.  A centerpiece on the table will create a mood for your event or you can choose to go large with scene setters.  Whether or not you intend to, your space will add or take away from your party.  If you are having people in your home for a celebration make sure the environment celebrates the occasion.  I am not saying that your house has to look like something out of Better Homes and Gardens, but take some time to pick up around the entertaining area and make sure your guests have a place to sit.

Food:

Everyone loves to eat.  I am a simple girl at heart so you won’t find anything too fancy or hard to pronounce at my party.  Heck, I don’t even think my formal dining table has been used.  Just like the communication and decoration, your food should match whatever feeling or mood you want to set.  If you are having a birthday party, think fun.  At a Christmas or Thanksgiving party, think warm and traditional.  It is also important to consider your seating as you prepare a menu.  Serving ribs with no table space for each guest will end up in dirty carpet and frustrated guests.  The most important rule at our parties is: place the utensils at the end of a buffet line.  My husband rants about this idea, which does make sense.  Your guests will not know if they need a spoon or knife until they make it through the buffet.  Don’t waste precious plastic-ware.  Think through your food choices and layout as if you were a guest.  Make sure it flows well and makes sense.

Entertainment:

Now it is time to have fun.  If you are planning a child’s birthday ages 4+ the games should be geared for the kids.  Most parents will sit on the sidelines.  If you are having a party for 3 year olds and under consider the parents as active guests.  Find games or activities that everyone can have fun doing.  For an adult party remember that everyone is a kid at heart.  Don’t rule out a piñata or 3 legged races, you can have even more fun than the kids…especially after a drink or two.  There are lots of games available for adults that will have you laughing and making memories in no time.

When planning your party make sure to take a moment to reflect on who knows who on your invite list.  If your guests do not know each other, make introductions and share a point of interest about each guests to start conversations.  This will put your guests at ease and allow you to move throughout the party instead of being tied down to lonely guests.  Name tags are almost always a mood killer.  Be creative and have markers for guest to write their names on cups.  If someone forgets a name it is easy to take a glance at their cup as a reminder.

These are the first steps to planning a successful party.  Anticipate your guest’s needs and think about what you would enjoy as a guest.  But remember that a party is for you to enjoy along with your guests, so don’t be so busy that you miss all the fun!  With some planning and acceptance of help, you too can enjoy every moment of your next perfect party.  So, go get your party hat and have some fun.

Krispie Kisses

Here is a great idea for kids to make for their friends, teachers, and loved ones for Valentine’s day.

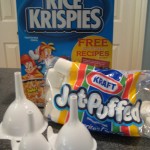
Materials:IMG_4320

3 tbls butter or margarine

1 package (10 oz., about 40) marshmallows

6 cups Rice Krispies

Funnel

Aluminum Foil

Paper

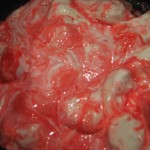
In large saucepan melt butter over low heat.  Add marshmallows and stir until completely melted.  Stir in food coloring and flavoring if desired.  Remove from heat.  Add Rice Krispies. Stir until well coated.  Let cool for 2 minutes.

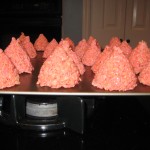
Spray funnel with Pam.  Spoon mixture into funnel and compact down to form the kiss shape.  Turn funnel upside down releasing the mixture on a cookie sheet.  Let cool for 30 minutes.

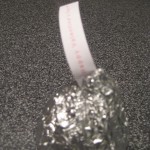
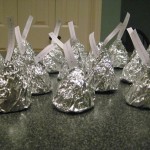
Using foil squares, wrap each kiss.  I found that pulling the foil in a diagonal motion looked more realistic compared to a chocolate kiss.  Print out a special message and cut into strips.  Add your special message before sealing the top of the kiss.

Take it to the next level:

-Add food coloring to the melted marshmallows for colored kisses (I used 8 drops of red to get this shade of pink)

-Use Cocoa Krispies for a chocolate flavored treat

-Add flavoring to the melted marshmallows (I used peppermint)

Krispie Kisses Message

For another idea using Rice Krispies Treats check out http://www.ricekrispies.com/#/recipes/valentine-cut-out-treats

Season of Love

The Hallmark holiday is quickly approaching…will you be in a loving spirit?  Although many people brush off Valentine’s Day as a useless holiday, I find the holiday to be more than just chocolates and cheesy cards.  If you allow yourself to celebrate love I am sure you will wear a smile on your face and have a better attitude.  Even if you are not in the arms of the perfect mate, Valentine’s Day is a time to celebrate all the love in your life.

Here are a few ideas to get the love flowing in your life:

-Add a few spots of red, pink, and white into your decor.  Hearts are a must!

-Find some local valentine’s cards to send out to family and friends

-Bake.  Food warms the soul and makes even the coldest heart smile.

-Make plans for February 14th no matter your romantic situation.  Not having any plans will just leave you miserable, even if you are in love.  No matter how hard you fight it, this is an important date.  If you find yourself alone, celebrate yourself by eating a delicious meal and taking a bubble bath.

Candy Vase

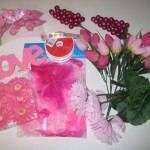
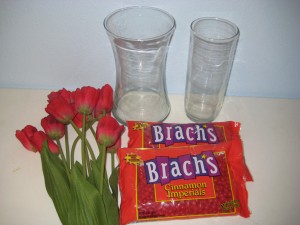
IMG_4249Materials:

Large vase

Small vase (needs to fit inside large vase)

Flowers (real or artificial)

Candy (I used conversation hearts and red hots)
Ribbon

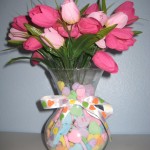
This is a cute idea to bring drama into a centerpiece for Valentine’s Day and is simple to do.  Gather all your materials and have them close at hand.

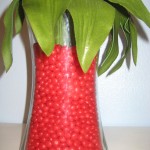
Place the small vase inside the larger one.  Pour 2 inches of candy into the large vase to make sure the smaller vase is secure.  Place your flowers in the small vase and arrange as you desire.  Continue filling the larger vase with candy up to the brim.  If you have difficulty getting the candy into the vase, roll a sheet of paper to use as a funnel.  To add a finishing touch, use any ribbon to tie a bow around the vase.

Stained Glass Sugar Cookies

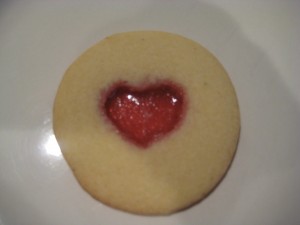
IMG_4224So for anyone who is scared to try new ideas out of fear of failure…get over it.  I saw this cute idea online and thought it would be super fun and easy.  Through a little trial and error I got one good looking cookie out of a dozen.   Don’t take shortcuts on this one and you will be more successful than me plus have beautiful cookies.

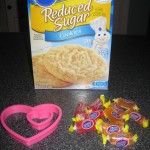
Start with your favorite sugar cookie dough.  I took the easy way and got a box mix at the store, which turned out to be a big mistake.  Make sure the dough is nice and cold.  Cover a cookie sheet with aluminum foil and spray with Pam.

IMG_4228

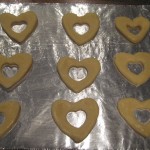
Roll out the dough to ¼ inch thick on parchment paper with flour so the dough will not stick.  Cut out cookies with a large shaped cookie cutter. Using a smaller cookie cutter remove the center of the cookie.  Place on the cookie sheet.

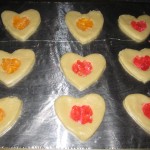
IMG_4229Place hard candies (I used Jolly Ranchers) in a zip lock bag and crush them into smaller pieces.  Place the crushed candy into the center of the cookie.  Be careful to not overfill the center.  Bake according to your recipe, about 8-10 minutes.  The edges of the cookie should be light brown and the candy melted.  Let cool for 5 minutes or until the candy has hardened.

A few tips and tricks:

-try coloring the dough red or pink

-use a textured cookie cutter to add a ruffled effect to the edge of the cookie

-make sure the cookie sheet is placed in the middle of the oven for even cooking.  Rotate the sheet half way through the cooking time.

Here are my results:

IMG_4237

Here is the original recipe:

http://familyfun.go.com/recipes/lovin-from-the-oven-685398

Groundhog Day Cupcakes

A friend sent me an article all about Groundhog Day cupcakes that I had to share.  There are some great ideas.  Take a look at the pictures and you can dissect each part and find candies and cookies that can turn into a groundhog with a little creativity.

http://entertainment.comedy.com/2010/02/02/15-silliest-groundhog-cupcakes

Get Crafting!